GROUPON GUIDE TO CHICAGO
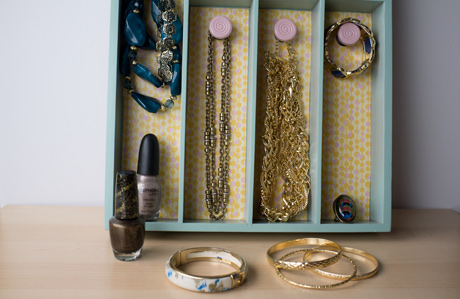
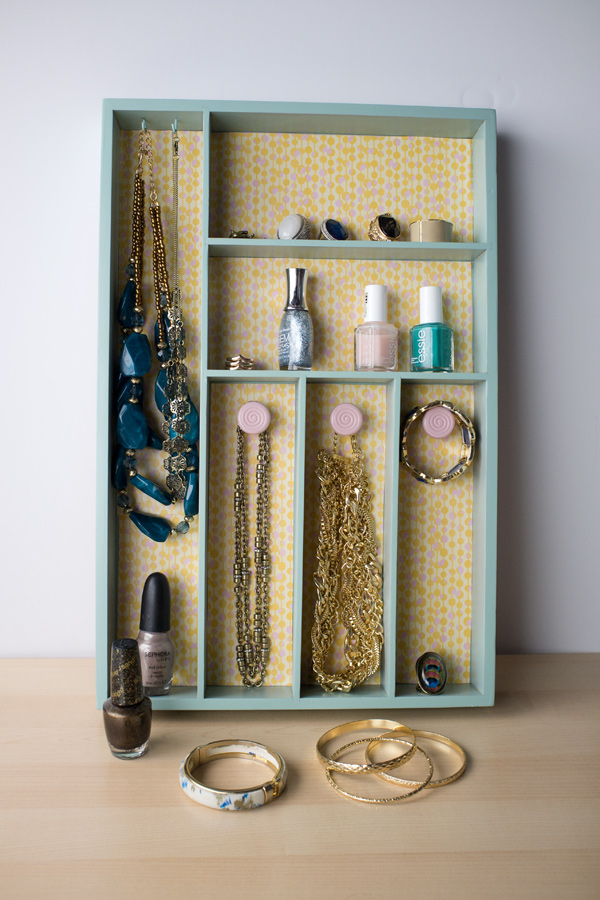
Turn a Silverware Tray into a Jewelry Organizer
BY: Sara Tremblay | Oct 22, 2013
 When I was little, I owned a ballerina jewelry box—the type with pink felt lining and a porcelain ballerina doll that spun inside. It didn’t seem right to fill such a pretty box with little kid things like slap bracelets, but I had better things to do (i.e. play) than worry about acquiring pearls.
I’ve since lost that jewelry box, but my jewelry collection has grown. For years, it has sat atop my dresser in cluttered piles. It was the sight of this tangled mess that recently motivated me to scavenge Pinterest and my favorite blogs for a DIY jewelry organizer. What follows is a step-by-step guide based on my online research and what I found worked best in practice. May your earrings never lose another mate to the space behind the dresser.
What You Need:
When I was little, I owned a ballerina jewelry box—the type with pink felt lining and a porcelain ballerina doll that spun inside. It didn’t seem right to fill such a pretty box with little kid things like slap bracelets, but I had better things to do (i.e. play) than worry about acquiring pearls.
I’ve since lost that jewelry box, but my jewelry collection has grown. For years, it has sat atop my dresser in cluttered piles. It was the sight of this tangled mess that recently motivated me to scavenge Pinterest and my favorite blogs for a DIY jewelry organizer. What follows is a step-by-step guide based on my online research and what I found worked best in practice. May your earrings never lose another mate to the space behind the dresser.
What You Need:
- Bamboo or wood silverware tray (I found a bamboo one at Bed Bath & Beyond for $20)
- Electric drill
- Mod Podge adhesive
- Newspaper
- Paintbrush or paint sponge
- Pliers
- Spray paint
- Super glue
- Three cabinet knobs (I found cute ones at Target for $9.99)
- Two teacup hooks or picture-frame hooks
- Two sheets of 12”x12” scrapbook paper
BY:
Deals in Chicago

Up to 57% Off on Exterior Car Wash at Circle K - Heartland (St. Louis)
83 Locations • 34.7 mi
Sale Ends 5/10
Three Ultimate Washes
Millennium Park Parking Deals
online_deal
$10.00
Reserve Parking (Daily/Hourly Rates Available)
1,000+ bought
Up to 28% Off on Defensive Driving Course
online_deal
Sale Ends 5/10
Defensive Driving Course for One Person
Deals in Chicago Other Deals in Chicago

Up to 22% Off on Exterior & Interior Car Detail at Carrectly
222 West Merchandise Mart Plaza, Chicago • 2.8 mi
22% discount_off
Full Exterior Detail, Ceramic Coating, and Disinfection
Up to 14% Off MDW Parking Pass at Park 'N Fly
5200 West 47th Street, Chicago • 6.1 mi
14% discount_off
One Three-Day Self Uncovered Parking Pass
Up to 30% Off at Valvoline Instant Oil Change - 18 Locations
19 Locations • 2.5 mi
30% discount_off
1012 Ogden Avenue: Maxlife Synthetic Blend Oil and Standard Filter Change